
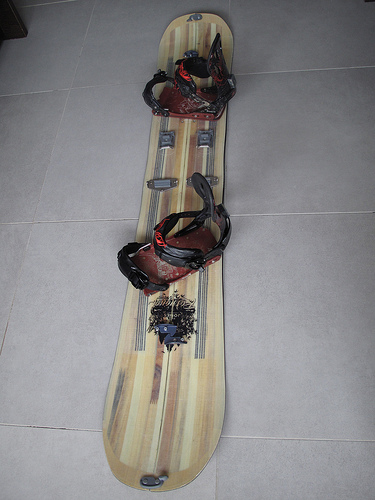
“The split with all of the hardware mounted”
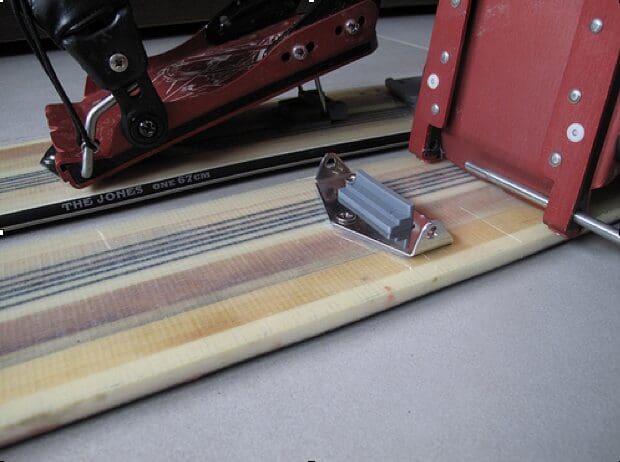
The next step I did was mounting the binding “pucks.” – It didn’t go perfect for me, but my board still works fine. – I put the board together using the clasps, then put a template sticker down where I wanted my front foot to be. – A very important step, as you can’t adjust your stance once you have the pucks screwed in, so make sure you have all the measurements and angles perfect! – I punched and drilled my holes, using one of the factory screw inserts on each puck to save a little bit of drilling. – Once I got both pucks mounted for the front binding, I slid the binding over the pucks to hold the board(s) in place while I did the back foot pucks. – What I didn’t notice right then was that when I slid the front binding on, the two halves shifted, allowing the binding to slide on, while shifting one half forward and the other half back. – Again, just a small mistake that doesn’t make too much of a difference (just 1/16th of an inch or so). – The back binding went just fine. “The binding pucks and the recessed binding plate that fits over the pucks. The metal pin locks the binding in place .”

The last pieces of hardware I had to mount were the tip and tail clasps. – Two more stickers, punching, drilling, and then bashing the back side of the rivet, once you have the clasps in place, to secure them in their places. – Smashing something with a hammer is always pretty fun, right? – No problems here! “A close up of the touring interface; pin goes through holes in bindings and touring brackets.”

Lastly, I mixed up some epoxy to fill all the counter-sunk holes on the base, as well as seal the core of the board where it had been cut in half so that it won’t immediately break down or rot. – Trying to keep this step neat and not spread epoxy every where will save you a good bit of sanding. – I was able to fill the aforementioned “play” between the two halves with some extra epoxy. – Once the epoxy had dried, I spent a few hours sanding the base flush and smoothing out the inside edges. – It was finally ready to ride. “Epoxy filled holes that were sanded flush”

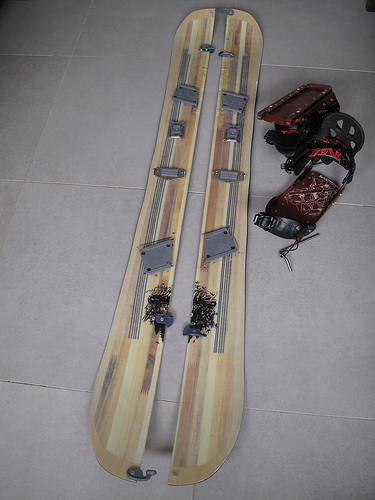
How’s it ride? – You can definitely feel some torsional softness, especially in the nose during a turn, and can even see the up-hill half of the board flexing more than the down hill half. – Also, it’s not as snappy in and out of turns on firm snow. – All in all, I’d say the mentioned performance issues for the down-hill ride are worth sacrificing for the up-hill benefits; once you’re in the pow you’ve worked for, the performance issues aren’t nearly as noticeable. – Have you made a split board? – Let me know if you have any helpful tricks or similar experiences! “Ready to Climb, just add skins.”
